Making a request
Digitizers
Rice. Graphics tablet
The device includes a special pointer with a sensor, called a pen. The native controller sends pulses along an orthogonal grid of conductors located under the plane of the tablet. Having received two such signals, the controller converts them into coordinates transmitted to the PC. The computer translates this information into the coordinates of a point on the monitor screen, corresponding to the position of the pointer on the tablet. With the pen you draw on the tablet, while graphic editor may perceive it as a brush, pencil, chalk, etc. By turning the pen over, you can erase the image. Digitizers, as the name suggests, are a tool for digitizing three-dimensional objects. For further processing and editing of scan results, there are many various programs.
3D digitizer

Rice. 3D digitizer
One example of a complete solution for digitizing objects of any shape is a low-cost digitizer made of model range MicroScribe-3D manufactured by Immersion Corporation. A three-hinged lever is attached to an asymmetrical base, ending with a pen-sensor. Low-friction hinges provide almost complete freedom of movement of the steel feather. The MicroScribe digitizer can digitize objects within a radius of up to 840mm. The lever of the devices is rigid, the presence of hinges allows you to draw an arc with a maximum angle of 330 °. The tip of the "hand" can have a different shape: in the form of a ball or a sharp needle - to take more accurate readings. The scanner also comes with foot pedals that act as the right and left mouse buttons.

Rice. Digitizer MicroScribe-3D.
Before each digitization, the digitizer must be calibrated. The user selects three reference points (front right, front left and back right) and enters their coordinates into the computer using the foot pedals. After that, you can proceed directly to digitization. Mechanical digitizers have a fairly high accuracy - up to 0.2 mm. Models from the MicroScribe-3D series can acquire coordinates at a rate of 1000 points per second and transmit information at a rate of 38 Kbps. Before scanning, many designers outline the object, draw lines along which the pen will pass. 
Rice. Preparing an object for digitization
You can digitize in semi-automatic and manual modes. A touch probe mounted on a collapsible articulated rebar reads where the head is located and translates this information into X, Y and Z coordinates in 3D space. The digitized data is further processed using special application programs (AutoCad, Autodesk, Maya, Rhinoceros, etc.).
It may take several hours to prepare for scanning and digitize a complex object, but with the accumulation of experience with a digitizer, this time is significantly reduced. In the process of scanning an object, as the coordinates of the points enter the computer, a spatial model appears on the monitor. To build 3D images, you can use programs from Immersion Corporation (Digitizing Software Application set), which allow you to represent scanned objects different ways, for example, in the form of points, lines, wireframe, splines, NURBS (non-homogeneous rational B-splines), as well as edit and save 3D images in dxf, IGES, obj, txt, 3ds files for subsequent import into other applications.
Specialists in custom models to digitize TV-quality models use more expensive digitizers to digitize their objects. For example, mobile coordinate measuring machines (CMM) FaroArm manufactured by FARO Technologies (USA) are used. The FARO CIM consists of a base plate that is attached to any suitable place and several articulated elbows. The design is very similar to the structure of the human hand. KIM FARO also has peculiar carpal, elbow and shoulder joints. Each joint has an angular movement control sensor that monitors the angle of rotation of the knee in real time, as a result of which the software calculates the coordinates of a calibrated probe - a kind of finger. Depending on the number of bends, there are machines with 6 or 7 degrees of freedom.
In essence, it is a contact probe that, using several potentiometers mounted on a folding armature with articulated joints, reads information about where the head is located and converts this information into X, Y and Z coordinates in three-dimensional space. It is enough to make the required number of measurements, and the grid is ready. The scanner uses a system of counterweights; it automatically takes temperature changes into account and compensates for the corresponding expansions and contractions of materials. This handheld device can handle objects within a sphere up to 3.65 m in diameter and has an accuracy of up to 0.3 mm.

Rice. Mobile coordinate measuring machines Faro Arm
Three-dimensional digitizers are used as systems for three-dimensional body scanning (3D body scan, i.e. "three-dimensional scanning of the human body"). The development of these systems was associated with the requirements of quickly measuring a large number of people (army), obtaining an accurate computer image (film industry) and individual tailoring. 3D body scanning is also used in medicine, animation and systems virtual reality(VRML).

Examples of body scan systems:
Cyberware Whole Body Color 3D Scanner (Cyberwear manufacturer). Now there are two models of full-scale body scanners: WB4 and WBX (WB = Whole Body, i.e. “whole body”). Symcad (French company TELMAT Industrie)
In geoinformatics, computer graphics, automatic design systems (CAD), cartography and scientific processing of measurement results, a digitizer is used as a device for manual digitization of graphic and cartographic information in the form of a set or sequence of points, the position of which is described by rectangular Cartesian coordinates of the digitizer plane.
The main types of digitizers according to the principle of operation:
Ultrasonic Of all the systems for digitizing 3D objects, ultrasonic (or sonar) systems are the least accurate and reliable, but at the same time the most sensitive to changes in the surrounding space. Ultrasonic digitizers are a system of transmitters rigidly fixed to the walls and ceiling. They look very unaesthetic. The transmitters emit sound waves, based on the information about the reflection of which the coordinates of points on the surface of the 3D model are calculated. Since the speed of sound depends on atmospheric pressure, temperature and other conditions (for example, humidity), the results of digitizing the same object are a function of the state of the air. In addition, these systems are very susceptible to the noise produced by various equipment (computers, air conditioners), even the buzzing of fluorescent lamps affects the digitization. In addition, ultrasonic systems make strange “clicking” sounds that irritate the operator and everyone in the room. Under ideal conditions, the absolute error of the results obtained is 1.4 mm. Such scanners are mainly used in medicine and in the digitization of sculptures.
electromagnetic The principle of operation of electromagnetic 3D digitizers is the same as that of ultrasonic systems (radar principle), only electromagnetic waves are used instead of sound waves to build a spatial model. The result of these scanners does not depend on weather conditions, but nearby metal objects or sources of a magnetic field reduce the accuracy of measurements. Naturally, such systems cannot digitize metal objects. Even in special rooms that do not contain anything metallic, the error of magnetic systems is at least 0.7 mm.
Laser First of all, it should be noted that the price of these so-called non-contact (the operator does not circle the object with a probe) systems is very high and it is not uncommon for it to be expressed as a number with five zeros (in US dollars). Laser digitizers have the highest accuracy, but their scope also has significant limitations. Great difficulties are caused by scanning objects with mirror, transparent and translucent surfaces, as well as objects of large size or having depressions or protrusions that prevent the direct passage of the laser beam. Laser digitizers - completely automated systems. The impossibility of the artist's participation in the digitization process does not allow to place accents, for example, to display a certain part of the object in more detail, or, conversely, leads to detailed models that take up too much space and require significant processing power. The digitization itself is quite fast, but the subsequent process of converting the automatically obtained data into the final image can take a long time (especially for systems with a point projection).
Mechanical These devices are the golden mean among all classes of digitizers. High accuracy and relatively low cost have made these devices the most popular. The principle of their operation is as follows: the contours of the object being digitized are traced with a precision probe, the position of which is measured by mechanical sensors. Then, using an array of 3D coordinates, special program builds a wireframe model of the object. A big advantage of mechanical scanners is that the results obtained with their help do not depend on weather conditions, noise levels, and the presence of electromagnetic fields. The type of surface also does not matter. Since mechanical digitizers are hand-held devices, their use requires fine coordination and attention.
Graphic tablets (digitizers)
Graphic tablet (graphics tablet) - a device for inputting vector graphic information into a computer. The “tablet” device (digitizer, digitizer or digitizer) consists of the tablet itself (a section of a flat surface) and a drawing device (cursor, stylus, pen, “gunner” - puck). When you press the cursor button, its location on the surface of the tablet is fixed, and the coordinates are transferred to the computer.
The digitizer is an absolute device. To set a certain position on the screen, you need to select the corresponding point on the tablet with the digitizer pointer (Table 4.4).
For each button of both the gunner and the pen, you can assign certain actions (copy, save etc.) The flexibility of making this assignment depends on the programmability of the device driver.
Often associated with a digitizer is command control in AutoCAD and similar systems using overlay menus. The menu commands are located in different places on the surface of the digitizer. When you select one of them with the cursor, a special software driver interprets the coordinates of the specified location, sending the appropriate command for execution.
For handwriting input devices, the same operation scheme is typical, however, the entered images of letters are additionally converted into codes using a recognition program, and the size of the input area is smaller. Pen input devices are often used in pocket computers, which do not have a full keyboard.
Table 4.4. Digitizer types
|
Principle of operation |
Description |
Device examples |
|
Acoustic |
The first devices in which the position of a pen equipped with a sound source (micro spark gap) is determined by comparing the delay of sound signals received by microphones located on the tablet. Susceptible to acoustic interference |
Generic name - spark tablet (spark tablets) |
|
Electromagnetic |
A wire mesh laid under the surface of the tablet produces a weak electromagnetic radiation, which is received by the pen and determines its coordinates. |
RAND Tablet aka Grafacon (Graphic Converter), 1964 |
|
Passive cursor |
The principle of electromagnetic induction is used. The wire mesh forms a collection of "antennas" that transmit and receive signals (the RAND Tablet only transmits). There are samples that perceive the force of pressure on the pen (a change in the capacitance built into the tip of the pen). Contactless removal of coordinates is possible. The pen may not require power |
Wacom technologies |
|
Active cursor |
The pen contains a signal generator that is perceived by the tablet, so it requires power sooner than the tablet itself. This also gives a clearer electrical signal than in the case of electromagnetic induction. |
FinePoint Innovations |
|
Resistive Touch Screen Technology (See Figure 5.28) |
Crossing coordinate wires are separated by a thin layer of insulator, the conductivity of which changes under pen pressure. Does not require pen power, perceives both coordinates and pen pressure |
Usage
- applications computer graphics(especially two-dimensional). Many graphics packages (e.g. Corel Painter, Inkscape, Photoshop, Pixel image editor, Studio Artist, The GIMP) are able to interpret pen pressure (tilt in some cases), changing attributes such as brush size, transparency, and image coloration based on data received from graphics tablet;
- in East Asia, digitizers, or pen tablets as they are called there, are used in conjunction with software like IMES (Input Method Editor Software) to enter handwritten Chinese, Japanese, Korean (CJK) characters. The technology is popular and inexpensive, and companies like Twinbridge Software provide users with programs that don't cost more than $100;
- technical drawing (technical drawings) and computer-aided design systems - CAD (Computer Aided Design - CAD);
- Finally, it's a winning alternative to the popular pointing device like the computer mouse.
Operating principles
The action of the digitizer is based on fixing the location of the cursor, usually using a grid built into the tablet, consisting of wire or printed conductors with a fairly large distance between them (from 3 to 6 mm). However, the mechanism for registering the position of the cursor makes it possible to obtain an accuracy of reading information that is much smaller than the grid step (up to 100 lines per mm). The reading step is called resolution digitizer.
According to physical principles, digitizers are divided into three types:
- electrostatic (ES);
- electromagnetic (EM);
- piezoelectric (PE).
In the first case, a local change in the electrical potential of the grid under the cursor is recorded. In the second - the cursor emits electromagnetic waves, and the grid serves as a receiver. It should be noted that during the operation of EM tablets, interference from emitting devices, in particular monitors, is possible. When pressed with a pen within the working surface of the PE tablet, under which a grid of the thinnest conductors is laid, a potential difference arises on the piezoelectric plate, which makes it possible to determine the coordinates of a point. Such tablets may not require a special pen at all and allow you to draw on the working surface of the tablet as on a regular drawing board.
Regardless of the principle of registration, there is an error in determining the coordinates of the cursor, called the accuracy of the digitizer. This value depends on the type of digitizer and on the design of its components. It is affected by the instability of the geometry of the recording grid of the tablet, the ability to reproduce the coordinates of a fixed cursor (repeatability), resistance to different temperature conditions (stability), the quality of the cursor, noise immunity and other factors. The accuracy of existing tablets ranges from 0.005 to 0.03 inches. On average, the accuracy of electromagnetic digitizers is higher than that of electrostatic digitizers.
The reading step of the recording grid is the physical resolution limit of the digitizer. We talk about the resolution limit because we have to distinguish between resolution as a characteristic of the instrument and as a software-defined resolution, and this is a variable in the digitizer setup. Both characteristics are always indicated in the product specification - the resolution limit and the accuracy (Table 4.5).
Table 4.5. Characteristics of digitizers
|
English |
Russian term |
A comment |
|
Work surface size |
Sets the size of the sensitive part of the digitizer surface |
|
|
Degrees of freedom |
Number of degrees of freedom |
Describes the number of characteristics of the relative position of the tablet and pen. The minimum number of degrees of freedom - 2 (coordinates X and At position of the projection of the sensitive center of the pen), additional degrees of freedom may include pressure, tilt of the pen relative to the plane of the tablet, etc. |
|
Permission |
Indicates the reading step of the digitizer (a physical characteristic, it is much better than the actually achievable accuracy of taking the coordinates of the pointing device) |
|
|
Accuracy |
Indicates the error of taking coordinates |
|
|
Exchange rate |
Indicates the actual rate of transmission of coordinates by the digitizer |
|
|
Technology |
Describes the physical principle of obtaining coordinates |
The end of the table. 4.5
|
English |
Russian term |
A comment |
|
Custom settings |
Availability and number of digitizer parameter settings saved with the possibility of subsequent recall |
|
|
Data formats |
It usually specifies the number of different data formats to which the digitizer interface can be configured. |
|
|
Hardware menu |
The number and type of hardware-implemented menus on the surface of the digitizer |
|
|
Indicators |
The presence or absence of indicators reporting the status of the digitizer |
|
|
Software security |
Diversity software, included in the standard delivery of the digitizer. Usually its diversity means nothing. The convenience of working with the installation program and setting parameters is important, as well as the availability of high-quality drivers for those programs with which you are going to work. |
|
|
orientation |
Ability to switch the direction of the digitizer axes |
|
|
Guarantee |
Standard warranty service |
|
|
feather. Characteristics include the number of buttons, type of pen tip sensitivity (insensitive, pressure sensitive switch, etc.), presence or absence of wire |
||
|
Characteristics of pointing device type cursor: number of buttons, presence or absence of wire |
||
|
Coating |
The presence of an additional coating of the surface of the digitizer |
The accuracy of the operator's actions also affects the result of the work. Average good operator introduces an error of no more than 0.004 inches. The requirements for it are quite high.
pointing device
Up to this point, when referring to a pointing device, we called it a cursor, although there is also a pen (or stylus). Pen-shaped pens are supplied with one, two or three buttons. In addition, there are simple nibs and pressure-sensitive nibs.
Cursor. Cursors are four-, eight-, twelve- and sixteen-button. Products of some manufacturers are an exception to the rule, for example, Ace Graphics adds a seventeenth, "most important" button on the large cursor. CalComp's four-button cursors are among the most popular and are the most photographed and featured in magazines. Here, the second and third buttons are side by side, with the first and fourth L-shaped framing the middle ones. The diamond-shaped arrangement of buttons is considered traditional, which other well-known manufacturers continue to follow. However, for twelve- and sixteen-button cursors, the standard is the "table" arrangement of buttons (as on a telephone set).
Feather. Pens are produced with one, two and three buttons. There are pressure-sensitive pens that are especially attractive to computer artists and animators. The degrees of pressure correspond to the thickness of the line, the color in the palette or its shade. As a result, it is possible to simulate on a computer the process of painting with oil paints, tempera or watercolor on a specially selected texture. To implement these features, you need to have special software.
The convenience of a pen is a purely subjective characteristic, just like when choosing a fountain pen. Some like the lightweight Wacom nibs, while others prefer the heavier but well-balanced Kurta nibs. Both cursors and pens come with or without a wire. A wireless pointer is more convenient, but it must be battery powered, which makes it heavier and requires additional maintenance.
The exception is Wacom's passive non-radiating pens, however, they perceive half as many pressure gradations. There are models with modifiable cursors that can work with both external and built-in power.
Mouse. As accessories for some tablets, there are special mice, when using which the tablet acts as a rug. Since the resolution of a tablet is usually higher than the resolution of a conventional computer mouse, the use of a mouse-tablet pairing allows for greater accuracy when typing.
Most wireless tablets perform the functions of a traditional mouse and have two or three buttons (usually programmable) and a scroll wheel, which can be spring-loaded, have a limited rotation angle and software setting.
Binding to tablet coordinates is a property inherent in all tablet mice without exception. Unlike conventional manipulators of the same kind, in which the "up" and "down" are conditional and depend on the rotation of the hand, tablet mice are strictly tied to spatial reference points. They can be rotated around the axis as you like, but the "top" for them is always the top of the tablet, not their own.
In table. 4.6 shows the characteristics of some samples of digitizers.
Table 4.6. Some digitizer models
|
Characteristics |
General view of the product |
|
|
Genius G-Pen 340 |
Interface and power supply: USB. OS: MS Windows 98SE/ME/2000/XP. Tablet: working area 3" x 4"; resolution 2000 lines/inch. Pen: number of buttons - 2, pressure sensitivity -1024 levels, wireless. It has a programmable "Hot-KEY" zone. The pen buttons can work like the buttons of a conventional mouse, and can also be programmed to correspond to the right and left mouse buttons. |
|
|
Genius G-Pen 560 |
Interface - USB. OS - XP/2000, MacOS 10.2.5. Tablet: working area 4.5" x 6"; resolution 2000 Ipi. Pen: two programmable buttons, pressure sensitivity -1024 levels, replaceable nozzles, powered by AAA battery |
 |
|
Genius G-Note 5000 A5, 32 Mb |
Interface: USB. OS: XP/2000. Tablet: working surface A5 (8" x 6"), powered by 4 AAA batteries, 32 MB of built-in memory allow you to save more than 500 written pages. Nib: interchangeable tips |
 |
Continuation of the table. 4.6
|
Characteristics |
General view of the product |
|
|
Wacom Graphire4, A6.128 x 93 mm |
Interface: USB. OS: Windows 98SE/ME/2000/XP, Apple MacOS X 10.2.8. Tablet: A6 active area (128 x 93 mm active area), 2032 lpi. Pen: number of buttons - 2, pressure sensitivity - 512 levels, wireless |
 |
|
Hitachi T-15XL EM Panel, A4+, 304 x 228 mm, TFT, 15", VGA, USB, audio |
To tablet (workspace A4, 304 x 228 mm) a monitor is mounted - 15 "LCD TFT. Pitch size - 0.297 mm, maximum resolution -1024 x 768, color palette - 18-bit (262,144 colors), brightness - 250 cd / m 2, contrast - 400: 1, left/right viewing angle 60760°, bottom/top viewing angle 60740° Interfaces - VGA, HD-15F, USB Type B Audio input - mini 3.5mm stereo, audio output - mini 3.5mm stereo Power adapter - 220 V (AC, current), 50/60 Hz, 30 W |
 |
|
Hitachi StarBoard BT-1 |
Interface: USB, Bluetooth. OS: Windows XP. Tablet: working area 4.5" x 6", resolution 500 dpi. Pen: number of buttons - 1 |
 |
|
Wacom Graphire4 Classic |
Interface: USB. OS: Windows 98SE/ME/2000/XP, Apple MacOS 9.0, Apple MacOS X 10.1.5. Tablet: working area A6 (128 x 93 mm), resolution 2000 dpi. Pen: number of buttons - 2, pressure sensitivity - 512 levels, wireless. The maximum working distance is 5 mm. Mouse: Wacom EC-140, optical, wireless, 2 buttons, button/scroll wheel |
 |
The end of the table. 4.6
Control questions
- 1. What is the working principle of thermal inkjet printer?
- 2. What is the working principle of the piezo inkjet printer?
- 3. What are the types of printer paper feeders?
- 4. Describe the internals of a laser printer.
- 5. What is the operating principle of thermal printers?
- 6. Describe the device and principles of operation of scanners.
- 7. What are the parameters of scanners?
- 8. What types of scanners do you know?
- 9. What is the working principle of pen plotters?
- 10. What are the characteristics of plotters?
- 11. What is the operating principle of laser plotters?
- 12. What is the principle of operation of electrostatic digitizers?
- 13. What is the principle of operation of electromagnetic digitizers?
- 14. What are the characteristics of digitizers?
Rice. 3. Cursor
Cursors are four-, eight-, twelve- and sixteen-button. Wanting to stand out, some firms try to be the exception to the rule. So, Oce Graphics adds the seventeenth "most important button" on the big cursor. For many AutoCAD users, "the more the better", because additional buttons can be assigned one-step functions in the AutoCAD MNU file. The shape of the cursor, the ease of pressing and the location of the buttons on it are the subject of distinction and prowess of manufacturers. All over the world, four-button cursors from CalComp are recognized as one of the best. They are most often photographed and placed in magazines. On them, the second and third buttons are located side by side, and the first and fourth L-shaped ones frame the middle ones at the edges. The diamond-shaped arrangement of buttons is considered traditional, which other well-known manufacturers continue to follow. However, for twelve- and sixteen-button cursors, there is only one canon - the "table" arrangement of buttons, as on a telephone set. In the cursor, the quality of the reticle is important.
When choosing a cursor, it is necessary to take into account, in addition to the convenience of its use, also the number of keys on it. Those who worked in AutoCAD for DOS know that the more keys on it, the better. For AutoCAD for Windows, this is not entirely true. The fact is that the use of additional, more than three, keys when working in "mole" mode To avoid problems, it's better to use the dedicated digitizer control software that often comes with the digitizer, but it's easier to ditch the multi-button cursor in favor of a four-button cursor and use only three of its buttons.
Flexible flatbed digitizers
DrawingFlex is a flexible graphics tablet. The DrawingFlex has the same capabilities as a conventional digitizer, but it's also much lighter and its working area is made of a flexible material similar to a rectangular piece of linoleum. You can easily roll it into a tube, which is very convenient in case of transfer, moving and other transportation, however, as well as in the case of storage. If you need to accurately enter graphic information not only at your workplace, then a flexible digitizer is the only acceptable solution. It is also invaluable when the work of entering graphic information is not a permanent occupation, and there is not enough space in the office. And finally, the flexible digitizer provides the same accuracy as a conventional digitizer, but at a lower cost.
The tablet is available in two sizes: 762x914 mm of the working area and 914x1219 mm of the working area. A unique feature of DrawingFlex is the ability to use it in two orientations: with the controller bar on the right or on the left - whichever is more convenient for the user (for example, if he is left-handed, or in order to place the controller bar in the space provided for it, since it is somewhat thicker and heavier than the entire digitizer tablet). To do this, the built-in menu bar, located at the top right above the workspace, is duplicated at the bottom left. That is, by going around the digitizer around (or turning it 180 degrees) you will again get the built-in menu on the top right. To switch the digitizer to a new orientation, simply point to the "Active Menu" button on this menu. Other amenities include a slot for storing custom menu overlays and a special recess for a pointing device (cursor or pen) when not in use temporarily.
For flexible digitizers, the most convenient wireless pointing devices such as a cursor and pen are used. The cursor can be with four and sixteen buttons. The pen tip is pressure sensitive (acts like a button), plus there are two buttons on the side of the pen. As an option, you can order a pen with AFT (Advanced Function Technology - advanced functional technology) - a pen with dynamic sensitivity, including sensitivity to tilt, distance from the surface of the digitizer and pressure force.
DrawingFlex is easy to connect to your computer. Almost the entire installation process consists of connecting the digitizer cable to the computer. When first turned on, the digitizer is set to emulate the GTCO data transfer format. There are two other preconfigured configurations. You can call any of them through the RESTORE buttons. Any of your installed digitizer configuration can also be remembered for later use by assigning it to the RESTORE buttons
As it should be, the flexible digitizer uses flexible software that runs under both DOS and WINDOWS. It allows you to select any of the many modes of operation of the digitizer through an easy-to-use setup program. The widest range of drivers for application programs provides flexibility in its configuration and successful use in any application. You can use it in the digitizing mode of specifying coordinates and in the "mouse" emulation mode. It is possible to apply overlay menus and record macros for their subsequent execution by pointing to a special button in the button bar of the digitizer menu. To do this, there are 18 additional buttons in the menu and up to 16 buttons on the pointing device.
Digitizers are:
● electrostatic;
● electromagnetic.
IN electrostatic digitizers register a local change in the electrostatic potential of the grid under the cursor, and in electromagnetic - the cursor emits an electromagnetic signal perceived by the grid. The electromagnetic digitizer is sensitive to interference from external sources such as monitors.
Reading step information is called the resolution of the digitizer. The resolution is physical and logical. The limit of the physical resolution of the digitizer is determined by the reading step of the recording grid. The logical resolution is a variable in the digitizer setting and, as mentioned, can be much smaller.
Digitizer Accuracy(accuracy) is determined by the error in determining the cursor coordinates (although, strictly speaking, the accuracy is the reciprocal of the error and depends on the type of digitizer and its design features). The accuracy of existing models ranges from 0.005 to 0,03 inches, for electromagnetic digitizers is usually higher than for electrostatic digitizers. The accuracy of the operator's actions also affects the resulting image input accuracy; on average, a good operator introduces an error of no more than 0~004 inches.
Workspace size(surface sizes) is determined by the size of the active surface of the digitizer.
Exchange rate(output rate) - speed of transmission of coordinates by the digitizer. The speed of exchange of the digitizer with the computer depends on the operator, but is usually limited by the technical capabilities of the device at the level of i00 - 200 points/s. Digitizer pointing devices:
● feather - a pointer equipped with one, two or three buttons. There are simple pens that determine the force with which the pen tip is pressed against the tablet. The latter are often used by artists, since they can perceive up to 256 gradations of pressure (the thickness of the line, the color in the palette, and the shade of the color depend on the degree of pressure). To implement these features, you need Adobe PhotoShop, Aldus PhotoStyler, Autodesk Animator Pro, CorelDraw, etc.;
● cursors - used less often, usually in complex applications. They are 4-, 8-, 12, 16-key. From two to four keys of them are standard, the rest are programmed in applications, such as AutoCad. The design of the cursors is very different, up to the shape of the mouse. Both cursors and pens come with or without a wire. The latter option is more convenient to use, but requires a battery and, accordingly, additional maintenance. The exception is. passive non-radiating nibs from Wacom.
When choosing a digitizer, you should first of all make sure that the pointing device is reliable and convenient. You also need to choose the dimensions of the working field - they range from 6 x 8 to 44 x 62 inches, evaluate the required accuracy of the cursor coordinates and compare it with the resolution of the digitizer.
Finally, make sure that you have all the necessary software and, in particular, drivers.
Foundations Digitizers can be rigid or flexible, the latter being lighter, more compact to transport, and cheaper.
Digitizer examples: CalComp DrawingFlex 333641, 334841; OTCO Roil-up 2024R, 3036R, 3648R (flexible); CalComp DrawingBoard 3400, Summa Grid, Kurta X1 C, OTCO Super L22 (hard large format up to 1220 x 1524 mm); CalComp DrawingBoard W 34180, Hitachi Puma Pro, OTCO Ultima, Kurta XLP, Kurta XGT, SummaSketch W (Z rigid format). In table. 7.15 shows the main characteristics of some digitizers.
Plotters
Plotters (plotter, plotters) - devices for outputting graphic information (drawings, diagrams, drawings, diagrams, etc.) from a computer to paper or other media. Plotters according to the principle of imaging can be divided into two classes:
● vector types in which the writing unit can move relative to the paper along two coordinates at once, and the image on the paper is created directly by drawing the necessary lines and curves in any direction;
● raster type, in which the writing unit moves relative to the paper in only one direction at a time, and the image on the paper is formed line by line from sequentially applied dots.
According to the principle of operation, plotters are:
● feather;
● inkjet;
● laser;
● thermographic;
● electrostatic.
Vector plotters are only pen plotters, other types of plotters are raster.
Types of plotters
Pen plotters(pen plotter) are electromechanical vector-type devices in which an image is created by drawing lines using a writing element, generically called a pen. As pens in different models of plotters, pens, fiber and plastic rods (felt-tip pens), ball knots of disposable and reusable action, pencil leads and crayons are used.
Pen plotters can be:
● rolled;
● tablet. Rolled plotters are more compact, convenient and accurate in operation; they are used most often to create large-format drawings in A1 and AO formats, and the unwinding and cutting of the drawing sheet from the roll paper is performed automatically. Tablet plotters. commonly used to create format drawings A3 and less.
Feather plotters that consume ink provide high quality both monochrome and color images, but have a low plotting speed, since it takes time for the dye to flow out of the pen and dry. In addition, liquid ink nibs require regular maintenance and cleaning due to the frequent clogging of the ink supply channel with solid fractions, including particles of dried ink. When using pencil leads, the quality is worse, but the drawing speed is higher and, most importantly, maintenance of the writing unit is much easier and cheaper (just replacing the lead purchased at the stationery store). Felt-tip and ballpoint pen plotters, in their characteristics, occupy an intermediate position between those discussed earlier.
Leading pen plotter manufacturers: CalComp (who created the world's first plotter in 1959 - the CalComp 565 model), Hewlett-Packard, Summagraphics, Mutoh (in particular, the Mutoh XP 620 pencil model). It must be said that pen plotters are being gradually and intensively replaced, in particular, by inkjet plotters.
Inkjet plotters(inkjet plotter) when forming an image, droplets of ink are directed onto paper using the smallest nozzles of the print head - the so-called “bubble” inkjet printing technology, described briefly when considering inkjet printers. The quality of drawings produced by inkjet plotters is very high. There are three types of inkjet plotters:
●monochrome;
● colored;
● with the possibility of color printing.
Color inkjet plotters have more nozzles in the writing head, but their resolution is reduced by about half,
To create a color image, the CMYK color scheme, usually accepted in printing, is used, that is, four groups of nozzles are implied, each of which receives a dye of a certain color: Cyan - cyan, Magenta - magenta, Ueloch - yellow, blacK - black. Color plotters are often referred to as full color plotters to distinguish them from plotters with color printing capability. Color inkjet plotters allow you to make only lines colored or paint entire areas in different colors, they do not know how.
Examples of inkjet plotters: Hewlett - Packard HP 220, Summagraphics SummaJet 2M, CalComp TechJet Designer 720 (monochrome); CalComp TechJet Color, Hewlett - Packard HP 650C, Encad Novajet 3 (full color). The plotting speed of inkjet plotters is also low, so it is not advisable to use them to display large amounts of graphic information.
Electrostatic plotters(electrostatic plotter) are based on the technology of creating a hidden potential relief on the surface of a special electrostatic paper with the help of recording heads and depositing a liquid dye on this relief. To obtain a color image, the drawing process is repeated four times (CMYK color scheme), which, of course, is not very convenient. The second significant drawback is the use of special expensive electrostatic paper. The image quality and drawing speed of these plotters are high.
Thermographic plotters(often referred to as direct imaging plotters) use a special thermoset paper that darkens when exposed to heat. The drawing is only monochrome and is applied to it with special miniature heaters made in the form of a “comb”. Resolution (up to 800 dpi) and drawing speed (up to 50 mm/s) are very high; thermal paper is not too expensive, and the devices themselves are simple and do not require regular maintenance. Therefore, thermographic plotters are widely used, in particular, in design organizations with large amounts of drawing work. Examples of thermal plotters: CalComp DrawingMaster 600, CalComp DrawingMaster 800, OCE G9050-S. There are also thermographic plotters that use thermoset carbon paper, while color printing is possible by performing four passes with carbon paper of different colors, but they have not received noticeable distribution.
In laser plotters(laser plotter) "a rotating drum coated with a semiconductor layer" serves as an intermediate carrier. Laser-charged regions of the semiconductor attract dry toner, which is then transferred to the paper passing under the drum. After that, the paper with the applied toner passes through the heater, under the action of heat the toner is baked and fixed on the paper (typical electrographic technology). The advantages of laser plotters are obvious: the use of plain paper, high image quality (resolution up to 800 dpi) and speed (up to 50 mm / s), noiselessness and full automation of work, there is a fundamental possibility of color printing, but the cost of the plotter increases. Recently, laser plotters have appeared that use not a laser beam, but a line of dot semiconductors to apply a potential relief on a drum. LEDs (Light Emitting Diode - LED), which made the plotter simpler and more reliable (the so-called LED plotters). They are also relatively expensive, but are used quite intensively in complex systems.
Examples of LED laser plotters: CalComp Solus4-АО, OCE 9555, JDL 400OE. Plotters are rolled and flatbed, many of them have a very capacious built-in memory (from 2 to 64 MB), a display, allow you to select several (2-7) data formats, and have a number of other service options. Built-in memory in plotters is used to improve their functional performance (speed, ease of use, autonomy); this buffer memory is loaded with graphic information, which is processed by the plotter processor when creating an image. For pen plotters, memory provides only a certain autonomy of their work, and for raster models, it is also important for ensuring speed, resolution, and image format.
When choosing a plotter, you should pay attention to the following aspects:
●set functionality, by which you can evaluate the applicability of the plotter to solve specific problems (sizes of media and images, the amount of work performed, etc.);
● the possibility of forming a color image;
● image quality (resolution);
● performance (drawing speed);
● reliability and convenience of work, level of service;
● possibility duration battery life(without operator intervention);
● operating costs, including the cost of media, consumables, device maintenance, power consumption;
● plotter price.
In table. 7.16 shows the main characteristics of some plotters.
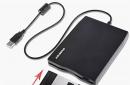
A digitizer is a device for converting finished (paper) images into digital form.
The digitizer consists of:
The tablet to which the image is attached;
The pen, or cursor, used to indicate a position on a tablet.
When moving the cursor over the tablet, the digitizer transmits the coordinates of the points to the computer.
A digitizer can be connected to the JULIVI system. Using a digitizer, you can enter ready-made patterns into the system database.
Archiving patterns in the JULIVI system is quite simple, and involves working with various types patterns and wiring.
Digitizer connection
The digitizer is connected to a computer on which the patterns will be entered into the system.
The digitizer is connected to the computer's COM port. For reliable operation, it is necessary to install an additional PCI controller with COM ports (RS232) in the computer.
Connect the cable from the digitizer to the COM port of the computer only when both the computer and the digitizer are disconnected from the mains. Failure to comply with this condition, as a rule, leads to the destruction of the COM port.
Digitizer setup
For the correct operation of the digitizer in the system, it is necessary to configure it.
As a rule, the setting is made after the first connection of the digitizer to the system.
If the digitizer was configured earlier, then when rearranging the system, it is enough to copy the previously saved confarj.ini file to the C:\Julivi\Constr\ directory, in which all the digitizer operation settings are saved.
The setting is carried out in the following sequence:
- Power on the digitizer.
The Pattern Archiving window will be displayed.

- In this window, in the pattern parameters, enter the material, name group, pattern name and select the size in the size scale (you can set any values). Press the YES button. The digitizer window will appear on the screen.

To enter the digitizer settings mode, you must:
- Simultaneously press the Ctrl + Alt + F1 buttons. In this case, the red inscription Setup mode and the Digitizer setup window will be displayed in the upper part of the window.

How to work with the settings window
1. In the Digitizer type list, select the type of digitizer. The screen shows one of the options.
2. In the Exchange settings section, set the following parameters:
Speed - which digitizer outputs information
Stop. Bit - the number of stop bits in the message from the digitizer
Inf. Bit - the number of information bits in the message from the digitizer
Control - used control of the parity in the message from the digitizer
These parameters are usually specified in the digitizer documentation, or taken from the digitizer settings, if the digitizer has a settings panel.
The screen shows one of the options.
3. In the ComPort block, select the port to which the digitizer is physically connected.
4. Press the Finish button. The Digitizer Settings window will close.
5. To read the modified parameters, click the Exit button on the text bar. The panel can be placed outside the screen margin, but the edge of the panel will still be visible. To click the Exit button, you will need to point to the bottom of the visible edge of the text panel and click the left mouse button, or exit the program using the Alt + F4 keyboard shortcut.
6. Then, in the Error / Buffer empty warning that is displayed, click OK.

7. In the Archiving patterns window, click the YES button again.
8. Enter configuration mode again (Ctrl + Alt + F1).
9. Press the Measure matrix dimensions button. Then place the digitizer cursor on the digitizer surface and press any button on the cursor. In this case, four groups of numbers will be displayed above the Digitizer Settings window.
- Smoothly moving the cursor to the left border of the digitizer table periodically press any button on the cursor. In this case, the value of the first group of numbers will decrease. Achieve the smallest value (possibly 0).
- Smoothly moving the cursor to the right border of the digitizer table periodically press any button on the cursor. In this case, the value of the second group of numbers will increase. Achieve the highest value.
- While smoothly moving the cursor to the lower border of the digitizer table, periodically press any button on the cursor. In this case, the value of the third group of numbers will decrease. Achieve the smallest value (possibly 0).
- While smoothly moving the cursor to the upper border of the digitizer table, periodically press any button on the cursor. In this case, the value of the fourth group of numbers will increase. Achieve the highest value.
- Click the Finish measurements button and in the Save matrix size query, click the Yes button.
10. To read the changed parameters, press the Exit button. Then, in the warning Error / Buffer empty, displayed on the screen, click OK.
11. To calibrate the digitizer on the digitizer table with a pencil, draw four points at a distance of 500 mm in length and 500 mm in width. It is also possible at distances greater than 500 mm. The greater the calibration distance, the more accurately the digitizer will tune. So for the A0 digitizer format, you can set points along the length at a distance of 900 mm, and along the width of 700 mm. Points must be established with the greatest possible accuracy and with the help of accurate measuring devices.

12. Press the YES button again.
13. Enter configuration mode again (Ctrl + Alt + F1).
14. In the Digitizer settings window, in the Calibration area, in the Length line enter the size between the points along the length drawn on the digitizer, and in the Width line between the points along the width drawn on the digitizer.

15. Press the Tare button.
- In this case, a red inscription Left calibration point will be displayed above the Digitizer settings window. Then set the crosshairs of the digitizer cursor to point 1 and press any of the buttons on the cursor.
- In this case, a red inscription Right calibration point will be displayed above the Digitizer settings window. Then set the crosshairs of the digitizer cursor to point 3 and press any of the buttons on the cursor.
- In this case, a red inscription Upper calibration point will be displayed above the Digitizer settings window. Then set the crosshairs of the digitizer cursor to point 2 and press any of the buttons on the cursor.
- In this case, a red inscription Lower calibration point will be displayed above the Digitizer settings window. Then set the crosshairs of the digitizer cursor to point 4 and press any of the buttons on the cursor.
- Click the Finish button in the Digitizer settings window and, in the Save calibration results prompt, click the Yes button.
16. To read the changed parameters, press the Exit button. Then, in the warning Error / Buffer empty, displayed on the screen, click OK.
17. Click the Archive button again.
18. Enter configuration mode again (Ctrl + Alt + F1).
19. Press the Set Button Codes button.
- In this case, a red inscription will be displayed above the Digitizer settings window. On the cursor of the digitizer, you must press the button, which will later set the points of the share. For example, 5.
- At the same time, the following red inscription Button of the intermediate point will be displayed above the Digitizer settings window. On the cursor, press the button, which will later be used to set intermediate points. For example, 1.
- At the same time, the following red inscription will be displayed above the Digitizer settings window. End control point button. On the cursor, you must press the button, which will later set the final checkpoints. For example 2.
- In this case, the following red inscription will be displayed above the Digitizer settings window. Intermediate control point button. On the cursor, press the button, which will later be used to set intermediate control points. For example 3.
- Click the Finish button in the Digitizer settings window and in the Save button codes prompt, click the Yes button.

20. To read the changed parameters, press the Exit button. Then, in the warning Error / Buffer empty, displayed on the screen, click OK.
21. Press the Archive button again.
22. Enter configuration mode again (Ctrl + Alt + F1).
23. Click the Set panel location button. In this case, a red inscription Left will be displayed above the Digitizer settings window. top panel. Then set the crosshairs of the digitizer cursor to the upper left corner of the text command bar and press any of the given buttons.
24. In this case, a red inscription Lower right panel will be displayed above the Digitizer settings window. Then set the digitizer cursor crosshairs to the lower right corner of the text command bar and press any of the given buttons.
25. Click the Finish button in the Digitizer Settings window.
26. To read the changed parameters, press the Exit button. Then, in the warning Error / Buffer empty, displayed on the screen, click OK.
The digitizer setup is now complete.
To check the correctness of the settings, it is necessary to archive any existing patterns. Then, having saved this pattern, in the Constructor program, measure the distance between the points in the pattern in height and width, or along the diagonals. Compare the obtained measurement results with measurements between the same points on the existing pattern. If the deviation of the measurement results is more than 0.5 mm, re-calibrate.
Digitizer Models
There are different models of digitizers. Below are some of them.
UVGI -1
Digitizer type - UVGI-16M
Speed - 9600
Stop. Bit - 1
Inf. Bit - 8
Control - Odd
CD9XXX
To connect a digitizer of this type, you must specify in the settings:
Digitizer type - GTCO-BIN
Speed - 9600
Stop. Bit - 1
Inf. Bit - 8
Control - No Control
Setting up the digitizer through the built-in control panel.
Diagram of the internal settings of the digitizer

Checking the internal settings of the digitizer
- Connect the digitizer to the computer, connect it to the network, and turn on the power of the digitizer. The power button is located on the back of the digitizer in the lower left corner. After switching on, three short and two long sound signal.
The red indicator on the cursor lights up in two cases:
1. In operating mode, when the cursor is hovered over the working area of the digitizer.
2. In internal setting mode, hovering over the icons and selecting active lines in the settings panels.
- Move the cursor consistently over the lines of the setting panel, comparing them with the diagram.
- The red indicator on the cursor should be lit in the lines corresponding to the lines marked with red dots on the diagram.
- Proceed to the digitizer settings from the Constructor program.
Possible problems
The red indicator does not glow when the cursor is hovered over the working area of the digitizer.
Perform a restart.
- Turn off the power to the digitizer.

- Turn off the digitizer.
- Place the cursor on the digitizer field, while the red indicator should light up on the cursor.
- Setup completed.
2. After the restart, the cursor does not react when hovering it over the working field.
Perform fine tuning
- Power off the digitizer
- While holding the yellow button on the power supply on the reverse side of the working field, turn on the digitizer.
- Move the cursor consistently over the lines of the setting panel, comparing them with the diagram. The red indicator on the cursor should be lit in the lines corresponding to the lines marked with red dots on the diagram.
- If the settings on the panel do not match the diagram, perform the settings manually.
- Hovering successively the cursor over the lines in the panels, by pressing any button, activate the lines corresponding to the scheme, and deselect the rest. . When a line is selected, a red indicator lights up on the cursor and a short beep sounds. When the selection is removed, the indicator goes out.
- Move the cursor to the left setting panel, and in the SAVE block, selecting line 1, press any button. Three short two long beeps will sound and the red indicator will turn off.

- Turn off the digitizer.
- Turn on the digitizer. After switching on, three short and two long beeps will sound.
- Place the cursor on the digitizer field, while the light indicator should light up on the cursor.
- Setup completed.
E-LINK
To connect a digitizer of this type, you must specify in the settings:
Digitizer type - E-LINK
Speed - 9600
Stop. Bit - 1
Inf. Bit - 8
Control - No Control
If the digitizer worked in a different mode before connecting to the JULIVI system, it issues a different protocol, then to configure the digitizer, you need to initialize it:
1. Enter the setup mode of the program for working with the digitizer.

2. Turn off the power to the digitizer.
3. Put the cursor on the field of the digitizer and holding down the button "1", turn on the power of the digitizer. Three short beeps should sound.
4. Release button "1".
5. Press the button Initialize in the program, one beep will sound.
6. Click the Finish button. The Digitizer Settings window will close.
7. Turn off the digitizer.
Once turned on, the digitizer will be configured to work with the JULIVI system.
CALCOMP
Calcomp's DrawingBoard III -V series digitizers come standard with the default setting "GTCO BIN".
The configuration menu on the digitizer corresponds to the data in the table
| 1 | 2 | 3 | 4 | 5 | 6 | 7 | 8 | 9 | 10 | 11 | 12 | 13 | 14 | 15 | 16 | 17 | 18 | |
| A | 1 | 1 | 1 | 1 | 1 | 1 | 1 | 1 | 1 | 1 | 1 | 1 | ||||||
| B | 1 | |
1 | 1 | ||||||||||||||
| C | 1 |
1 - The light is on when you hover over the menu button.
With this setting of the digitizer in the program settings, you must specify:
Digitizer type - GTCO-BIN
Speed - 9600
Stop. Bit - 1
Inf. Bit - 8
Control - Odd
Optical, film digitizer
Setting up this type of digitizer differs from the rest in fewer settings.
The Logitech digitizer consists of a transparent film with a row of dot options buttons around the perimeter, a text panel in the upper left corner, a pen with a reader, and a driver installation disk.
Attention! This type of digitizer does not work when the Kaspersky Anti-Virus program is enabled, and when installed Framework 2 versions.
- Disable Kaspersky before installation.

- In the Kaspersky Anti-Virus window, select the Settings button.

- In the Settings: Kaspersky Anti-Virus window, select the Service directory.

- Next, in the Startup section, clear the selection in the line Run the application when the computer is turned on.
- Reboot computer
- If Framework2 is installed, you need to uninstall it and restart your computer.
- Install Framework 1 from dotnetfx.exe
- Insert installation disk Logitech or Nokia.

- Select installation language.

- Click YES when prompted to install the driver.

4. Adjust the settings as shown in the picture. Click Apply.
5. Copy files from the arj folder to the c/Julivi/constr4x folder:
![]()
Customization Features
- There is no need to calibrate or adjust the digitizer, all settings are made.
disable kaspersky, uninstall framework2 and install dotnetfx.exe
- If a red lamp lights up and the body vibrates when the pen is pressed, change the angle of the pen without lifting it from the film
- The processing time is long - from placing the pencil on the base until the pattern appears on the screen - up to 30 seconds.
- When archiving, you should be very careful, because the pattern will appear on the screen only after the handle is installed on the base.